If your home has suffered from flooding or water damage, one of the first things you’ll need to address is the condition of your floor molding. Often overlooked, this trim can trap moisture, grow mold, or warp over time. Knowing how to remove floor molding properly is a crucial step in preventing further damage and preparing for professional restoration.
In this guide, our experts at flooddamagerestoration.ca walk you through the safe removal process and explain why it’s often best left to professionals—especially in flood situations.
Why Remove Floor Molding After a Flood?
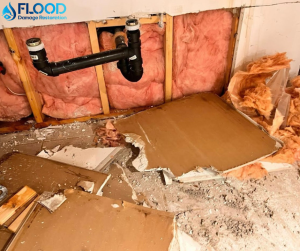
Floodwaters can easily seep behind baseboards and molding, creating hidden pockets of moisture that lead to:
- Mold and mildew growth
- Wall and subfloor deterioration
- Warping or buckling of wood trim
- Odours and poor indoor air quality
Removing floor molding gives you access to inspect the full extent of damage and begin the drying or remediation process.
Tools You’ll Need
Before starting, gather the following tools:
- Utility knife
- Pry bar or molding removal tool
- Hammer or mallet
- Work gloves
- Safety goggles
- Painter’s tape (optional)
- Zip-top bags or containers for nails/screws
How to Remove Floor Molding: Step-by-Step
Step 1: Inspect the Damage
Check for visible signs of water damage, swelling, or mold. If the molding feels soft or smells musty, it’s likely compromised.
Step 2: Score the Caulk Line
Use a utility knife to carefully cut through the caulk or paint line along the top of the molding. This helps prevent damage to the wall when prying it off.
Step 3: Loosen the Molding
Insert a pry bar behind the molding near a nailed section. Gently wiggle to loosen it from the wall. If you feel strong resistance, move along the trim and try again elsewhere.
Step 4: Remove Nails and Fasteners
Once the molding is detached, remove any remaining nails or fasteners from the wall or the molding itself.
Step 5: Label and Store (if reusable)
If the molding is still in good condition and you plan to reuse it, label each piece and store it in a dry, safe place.
Should You Remove It Yourself?
While knowing how to remove floor molding is helpful, there are risks in DIY removal—especially after flood damage. You could accidentally:
- Miss signs of hidden mold
- Damage drywall or flooring
- Fail to dry underlying materials properly
That’s where flooddamagerestoration comes in. Our certified technicians safely handle all aspects of flood recovery, including molding removal, structural drying, and mold remediation.
Signs You Need Professional Help
Call in professionals if you notice any of the following:
- Visible mold behind or under the molding
- A musty smell coming from the wall or baseboards
- Molding is swollen, cracked, or crumbling
- Recurring moisture even after initial cleanup
Don’t wait—delaying action can lead to more costly repairs.
Why Choose flooddamagerestoration.ca?
We serve homeowners across Ontario with:
- 24/7 Emergency Response
- IICRC-Certified Water Damage Experts
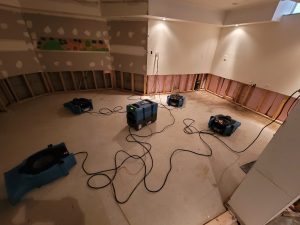
- Advanced Drying & Dehumidification Equipment
- Safe Mold Removal Services
- Complete Reconstruction & Restoration
Whether you need help removing damaged trim or rebuilding an entire room, we’re just a call away.
Final Thoughts
Understanding how to remove floor molding is an important skill during flood recovery, but it’s only the beginning. Make sure to follow up with a full moisture assessment and cleanup to avoid long-term damage.
Need help? Contact [email protected] for expert water damage restoration services across Ontario.
Call (416) 648-2895 Now!


